I built a Windows desktop application with Electron to keep all my class notes organized, searchable, and editable. In this post I’ll walk you through the main ideas behind the project, why I made it, and some highlights of its implementation, Check the full code here.
Motivation
As a student, I take all my notes in LaTeX (I’ll explain my full workflow in another post). Over time, I ended up with dozens of documents - chapters, images, and different subjects. Managing them became a nightmare and, on top of that, a huge waste of time.
That’s why I decided to build my own Notes Manager with Electron:
- Organize notes by subject.
- Create new notes quickly.
- Compile them all into a single PDF (optionally adding cover pages).
- View only a single chapter if I want.
- Track errata.
- Manage images and edit them in Inkscape.
- Customize the main color of each subject without editing complicated configuration files.
App Structure and Workflow
As I mentioned, I take my notes with LaTeX, using a fully customized Visual Studio Code environment. I have a full LaTeX distribution installed on my computer, ready to compile my files. To view the generated PDFs, I use Sumatra PDF, a lightweight PDF viewer. For editing images in my notes, I use Inkscape.
I’ve brought all these tools together in a centralized environment: my own Notes Manager app. To build it, I used Electron, a framework for building desktop applications with JavaScript, HTML, and CSS. I also used Bootstrap to create a simple UI. When you open the app, you can see this interface:
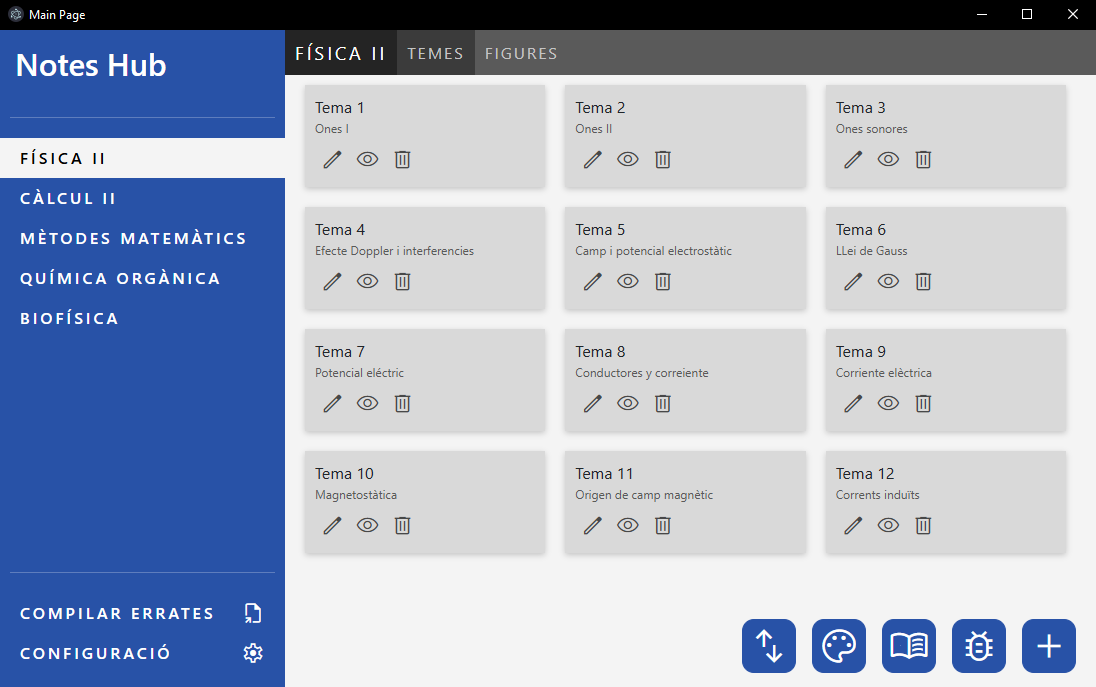
On the left, there’s a sidebar to select the desired subject. You can also generate an errata sheet to fix mistakes later or access the main configuration of the app. The main window displays all the different files for the selected subject (usually organized by chapters or topics) and their titles.
Each file can be edited, viewed, and deleted. You can also reorder files, change the main color of the subject, compile all the files to generate a main subject PDF, track errata, or add a new file.
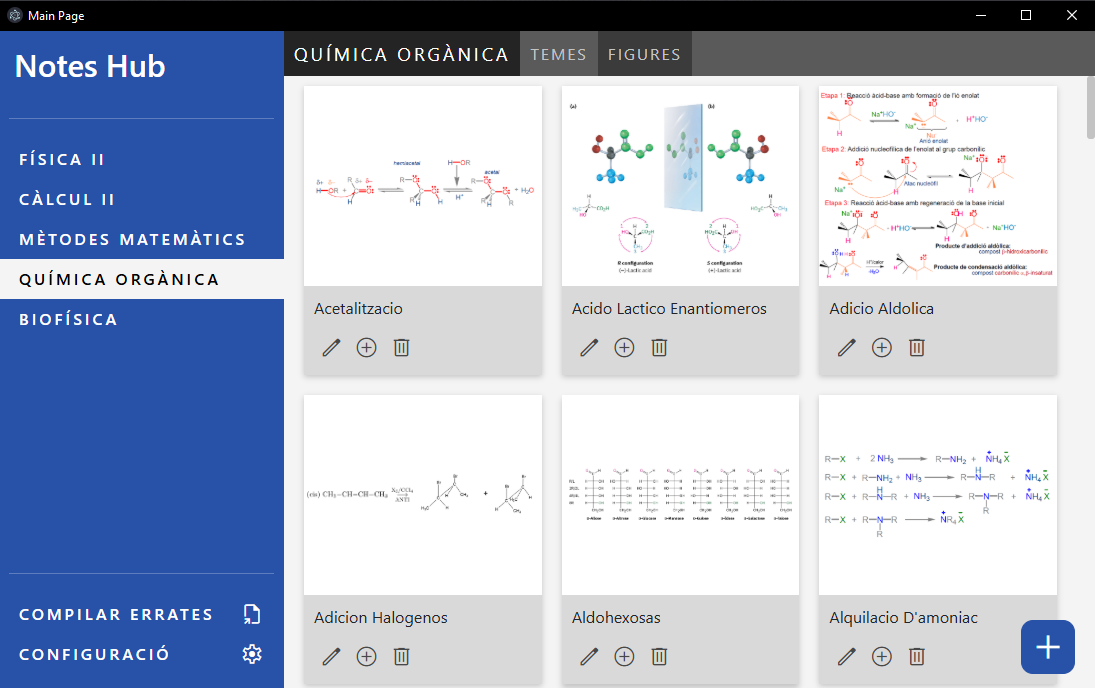
As you can see, the app also has a second tab: Figures. Here you can view and edit all the images that appear in your notes. There’s also an option to copy the LaTeX code for inserting the figure to the clipboard.
Internal Structure
The main folders of the project are organized as follows:
project-root/
├── main.js # Electron entry point
├── renderer/ # UI logic
├── styles/ # Bootstrap-generated CSS files
├── preload.js # Bridge between UI and Node core
└── temesManager.js & configManager.js # API functions and main functionality
A Glimpse at the Code
The entry point for Electron (main.js file) is pretty simple. We only customize the window a little and load all API functions.
1 | let win |
IpcRenderer: Node Isolation
When building an Electron app, it’s essential to separate the UI code from the main functionality. This prevents the renderer from having direct access to Node.js features, which may run with elevated privileges; isolating it makes the app less vulnerable to malware. In other words, to run Node.js code from UI actions (for example, launching VS Code on a button press), you need a bridge (the ipcRenderer) that tells Node which predefined function to run; and that’s where preload.js comes in. Here’s an example:
1 | contextBridge.exposeInMainWorld('api', { |
These functions are invoked from the UI thread (like the code below) and handled in the main process, which performs any operation that requires Node.js (file I/O, launching external programs, etc.).
1 | const files = await window.api.getAllFiles(subject.code) |
And are handled in the main pipeline like this:
1 | ipcMain.handle('getAllFiles', async (event, subjectCode) => { return await getAllFiles(subjectCode) }) |
Persistence of Data and Configuration
Since the application only needs to store a small amount of data—mainly program paths, file locations, and the list of subjects—I use a simple JSON file for this purpose. The file has the following structure:
1 | subjects: [ |
I can read and write this data with simple functions like these:
1 | getAllConfig (){ |
Compiling LaTeX Documents from Code
One of the most important features of the app is the ability to compile the LaTeX documents I write. The main use cases are:
- Compile a single topic (i.e., one file).
- Compile an entire subject.
- Compile all subjects, each with its own cover page.
Each type of compilation requires, on one hand, editing a master.tex file to include the desired files, and on the other hand, performing the compilation itself. For compiling, I use Node’s native exec function. After creating a helper function to promisify it, the code looks like this:
1 | const execPromise = (cmd, opts = {}) => { |
Global Shortcuts
Electron can register global shortcuts that work even if the app is not focused. I use this feature to add figures to my LaTeX documents quickly: pressing Alt+ctrl+F, focuses the app and opens a dialog to enter the figure name. Then it opens a new inkscape file to edit the image and it copies to the clipboard the Latex code to insert the figure. You can implement global shortcuts inserting this code on main():
1 | function registerGlobalShortcuts() { |
Then you have to add to preload.js
1 | contextBridge.exposeInMainWorld('rendererApi', { |
and call in your renderer pipeline:
1 | window.rendererApi.newFigureShortcut(async () => { |
Conclusions
With this program, I have a fully customizable environment for managing my notes and I can work much more efficiently. Since I take my notes live during class, I need a fast workflow to keep up with the professor’s explanations.
Check out the full code in the GitHub repo and see how my note-taking environment is configured.